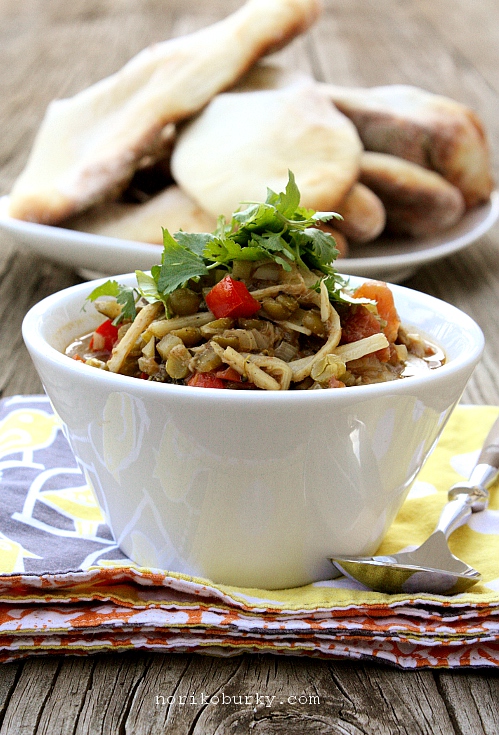
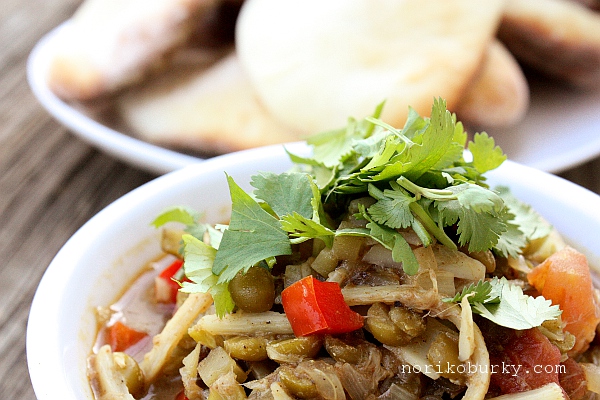
Soupy Curry with Hearts of Palm and Split Green Peas

Oh how I love Indian food…I think I can write a book on that if I’m asked 🙂  I grew up on Japanese curry that is made with meat and vegetables, seasoned and finished with a roux which comes in portioned packets.  This dish has been at the top of the list of many Japanese people’s favorite foods for as long as I can remember.   When I was little, I loved it so much.  Just like most of the other kids, I didn’t even mind eating school lunch if it’s on the menu.  (Although school lunches were so well-planned taking nutritional balance into consideration, I was too small to appreciate the luxury of that.)  It wasn’t until I was over 20 years old that I was introduced to real Indian curry.  I guess there is a good chance that the curry I ate at Indian restaurants in Japan were flavored in the way more approachable to the people there than authentic ones.  However it was a shock to see how different Japanese and Indian curries were in texture with a little similarity in flavor.  After this first state of shock, I got super curious how to blend all the spices and combination of ingredients.  I still think the one I made many years ago, cooked beef with 12 herbs and spices is my championship curry…yeah it came out great in a lucky way…mumble, mumble, mumble.  I guess that is enough of nostalgic talk for now, hehehe.  Now let’s talk about the curry that comes on our table these days.


Soupy Curry with Hearts of Palm and Split Green Peas

Having a no-meat eater husband and a son for whom every tiny bit of spicy kick is still a challenge, I make a mild and vegetarian-side curry with some room for me to play around with what ingredients to use.


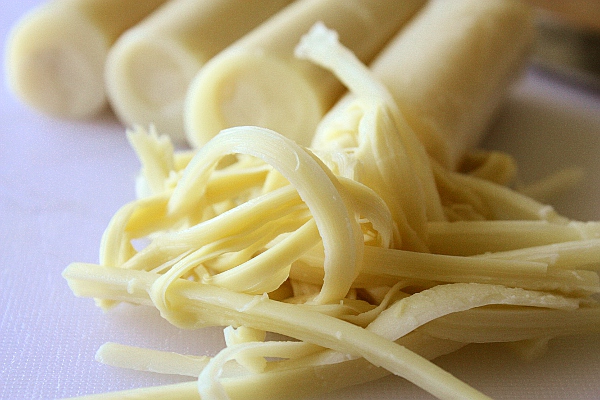
Today’s spotlight is on Hearts of Palm.  What a fun and useful ingredient it is!
It resembles string cheese and comes apart just like it, just far more delicate.  Encountering a food like this makes me wonder how much more stuff I may be missing in the world and simply drool over yet unknown tastes and textures.


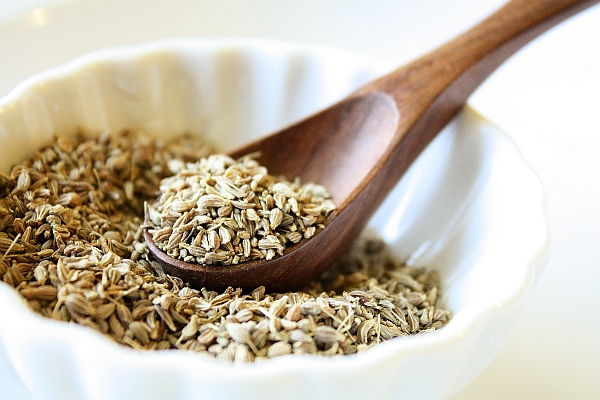
Anise seeds are, I personally think, an underestimated spice in cooking.  Its elegant smell caught me the instant I first experienced it and has hooked me for life.  It doesn’t cook tender or disappear in the process, rather insists on its existence with it’s crunchy bite among the other ingredients.  Not to mention the flavor it gives to a dish, I may have been mesmerized by its stubborn attitude.


Soupy Curry with Hearts of Palm and Split Green Peas
5.0 from 1 reviews
Print
Recipe Type: Main
Author: NorikoBurky
Prep time: 10 mins
Cook time: 30 mins
Total time: 40 mins
Serves: 4-5 people
Healthy and rustic curry made with vegetables, Hearts of Palm and split green peas.
Ingredients
  • 1 cup split green peas
  • 3 cups water
  • 1 can Hearts of Palm (14 oz/396g)
  • 1/3 onion, chopped
  • 3 cloves garlic, minced
  • 1/4 inch fresh ginger root, minced
  • 2 Tbsp canola oil
  • 1 Tbsp ground cumin
  • 1 Tbsp ground coriander
  • 1/2 Tbsp garam masala
  • 1/2 tsp anise seeds
  • 2 cups vegetables of your choice, diced
  • 1 tsp salt
  • 1/4 tsp black pepper
  • 3 cups water
  • 1 vegetable bouillon
  • 1 Tbsp soy sauce
  • bunch of cilantro, roughly chopped
Instructions
  1. In a pot, bring split green peas and water to a boil. Turn the heat down to low-medium, simmer for 15-20 mins or to your preferred tenderness. Drain.
  2. Meanwhile, drain Hearts of Palm and tear with your finger tips.
  3. Heat canola oil in a frying pan, add onion, garlic and ginger, cook until onion is transparent. Add ground cumin, coriander, garam masala and anise seeds. Cook for another 2 mins.
  4. Add vegetables, cooked split green peas and teared Hearts of Palm, stir well to combine. Season with salt and pepper. Pour in water and add vegetable bouillon and soy sauce. Stir well. Cover and simmer over medium heat for about 15 mins or until vegetables are tender.
  5. Add salt and pepper again if necessary. Serve with chopped cilantro.


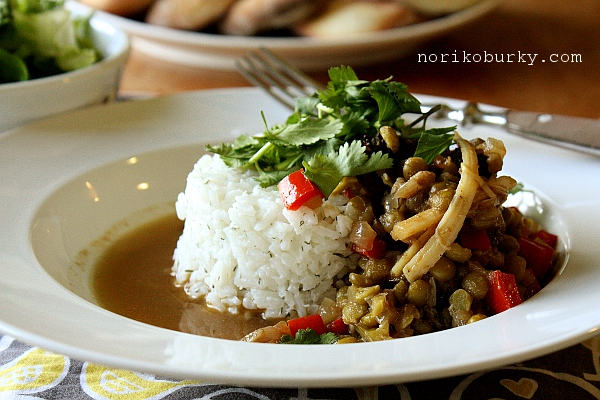
We had dill & yogurt rice with the curry.  Since I had run out of basmati rice, I used long grain rice instead.  Just cook the rice it in a pot, mix in dried dill, Greek yogurt and garlic paste. Add salt and pepper to taste and that’s it!  How easy is that?!

Served with a simple green salad and homemade naan.  Oh, I almost forgot to mention chutneys.  Mango chutney for sweetness and mint chutney for heat.  Those are two must-have items in my family when we have curry.

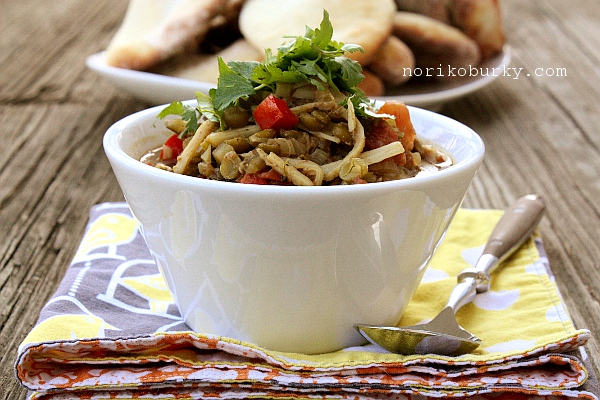
Vegetables I used are zucchini, red bell pepper and broccoli.  Tons of veggies and peas cooked with appetizing spices.  The total amount of oil I used is 2 tablespoons for yield of 4-5 people.  Not bad, huh?


Thanks for reading and hope you have a terrific weekend!!!


Posted in Entree, rice & grains, vegetables | 6 Comments

Cuatro Leche Layered Graham Cracker Cake with Strawberries

To make it clear I say from the beginning that I’m no baker.  But I love to eat those sweet desserts that melt in your mouth and make you think “this is what I worked hard for all day!”.  Although this self satisfactory mumbling can be irrelevant often times because I enjoy those sweets as breakfast.  Load myself with sugar and caffeine from coffee, that’s how to make a happy mom 🙂  Anyway, I remember telling myself the first time I was at an American grocery store that I would try making all the cake mixes I can find in the bakery aisle (and also try all different types of cereals).  In that matter, I had given myself generous amounts of grace time before running out of excuses before starting to bake.

I had a bag-full of fresh strawberries in my fridge which was not fresh enough to eat as they are, but I didn’t want to make jam because we still have a jar that needs to be consumed.
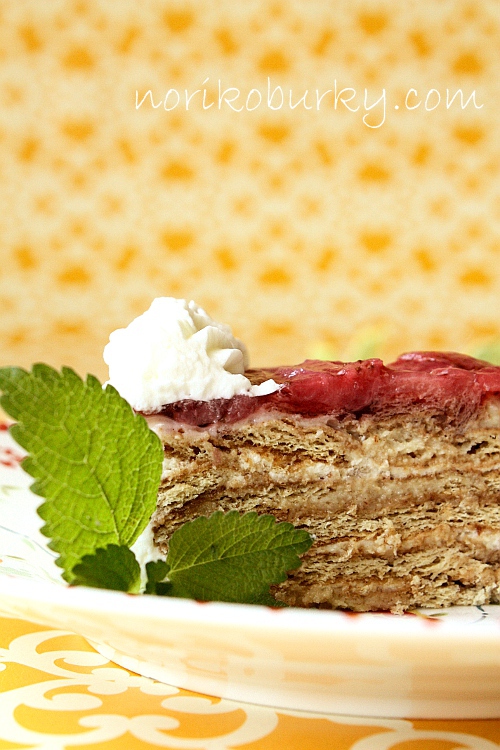
That’s how I came up with this no-bake layered cake.


Cuatro Leche Layered Graham Cracker Cake with Strawberries

The recipe may be a bit confusing since it requires separate preparation for each creamy goody.  Below is the simplified flow of the process.

* Prepare custard
* Prepare strawberry sauce
* Soak Graham crackers in milk mixture and construct
* Make whipped cream and decorate the cake


Cuatro Leche Layered Graham Cracker Cake with Strawberries
Print
Recipe Type: Dessert
Author: NorikoBurky
Prep time: 40 mins
Cook time: 15 mins
Total time: 55 mins
Serves: 8-10 servings
Incorporating four different kinds of milk products, no-bake cake.
Ingredients
  • For the custard***
  • 2 cups 2% milk
  • 3 Tbsp sugar
  • 1 tsp vanilla extract
  • 2 egg yolks
  • 3 Tbsp bread flour
  • For the strawberry sauce***
  • 10 large strawberries, sliced
  • 2 Tbsp sugar
  • 1 tsp lemon juice
  • 2/3 cup water
  • 1 1/2 tsp unflavored gelatin
  • 1 Tbsp water
  • For soaking Graham crackers***
  • 1/2 can evaporated milk (6 FL oz/about 180ml)
  • 1/2 can sweet condensed milk (7 oz/about 200ml)
  • 1 box Graham crackers (14.4oz/480g)
  • For the whipped cream***
  • 1 1/2 cup whipping cream
  • 3 Tbsp sugar
Instructions
  1. Firstly, make custard. Put milk, sugar and vanilla extract in a pot and place it over low-medium heat, stirring continuously. Separate egg yolk from the whites in a small bowl, break them. Keep stirring the milk mixture, make sure it doesn’t come to a boil. Scoop a tablespoonful of the milk mixture into the yolks and mix them well. Spoon 2 more scoops in, stir well each time. When the temperature of the egg yolks has raised this way, pour this back to the pot of milk mixture. Sift bread flour in to the mixture as you stir so it won’t form lumps. Remove from the heat when it thickens slightly.
  2. In another pot, heat sliced strawberries, sugar, lemon juice and water over high heat. When it gets bubbly, lower the heat then simmer for 8-10 mins, skimming occasionally. Remove from heat. In a small bowl, combine gelatin and water. Microwave it for 5-6 seconds. Pour it into the strawberries, mix well and let it sit to cool.
  3. Grease a 9 inch (22.5cm) round cake mold. In a large bowl, mix evaporated milk and sweet condensed milk together.
  4. Soak Graham cracker in the mixture, one cracker at a time, then place it in the cake mold. Repeat this to fill the bottom of the mold flat. Spread the custard over it. Stack another layer of soaked Graham cracker then spread the whipped cream. Repeat this step until you run out of Graham crackers.
  5. Pour the strawberry sauce (step 2) over on the top and spread it evenly. Chill it in refrigerator over night or 6-10 hours.
  6. Place the cake on a large serving plate, remove the outside ring of the mold. Decorate it with whipped cream.
Notes

I used a round cake mold with a detachable clip on the side because I wanted to decorate the side of the cake to finish. However, you can make this in a rectangular casserole dish and serve directly from it.

Be very careful when you take the gelatin-water mixture from the microwave since it’s very hot.

Break soaked Graham cracker into small pieces to fill the gap in each layer.


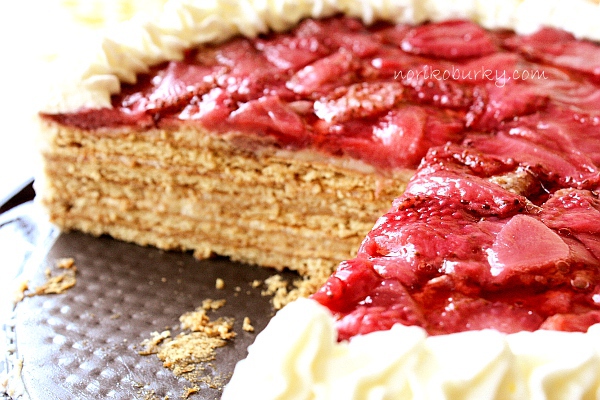
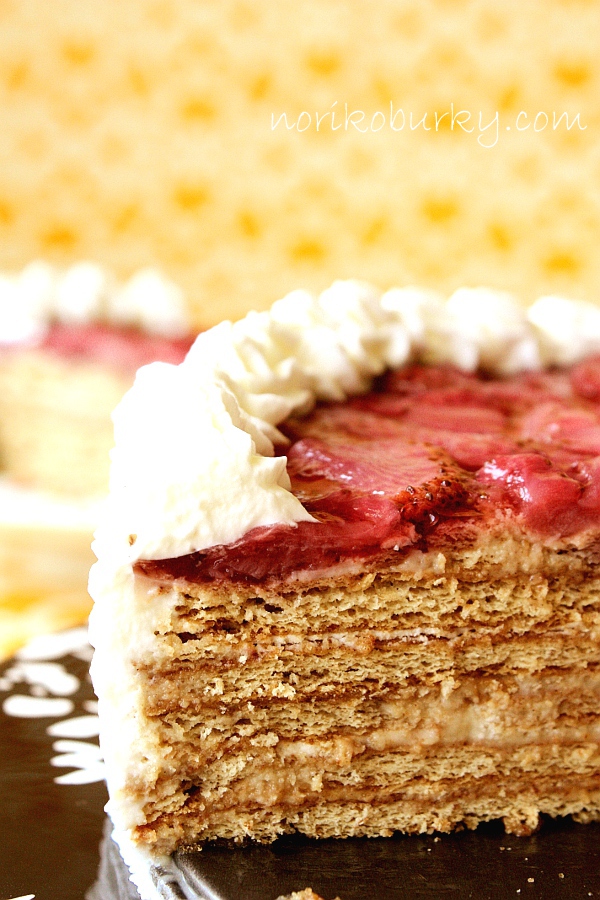
Whew!  That must be the longest recipe I ever made!  It all started from saving those strawberries that needed to be used urgently.  Although the recipe makes it look like a load of work at a glance, perhaps a picture of the cut section will give you a better understanding of how the cake is made.


When chilling it in the refrigerator, I placed the whole cake mold on a big plate, hoping that would catch any liquid if there is any sweet leakage from the bottom.  Yes, that turned out to be a good idea.

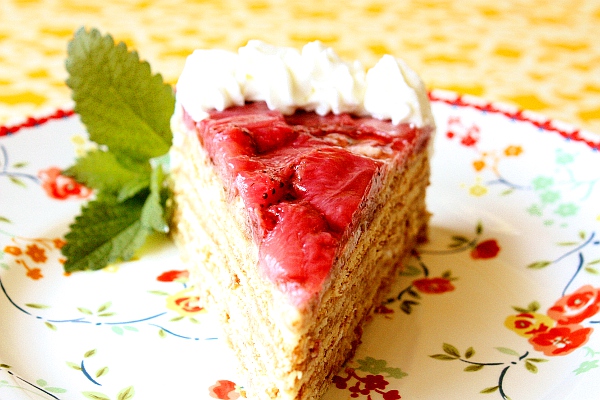
As an afterthought, the top strawberry part could have come out more bright red if I had used strawberry flavored gelatin instead of clear one.


I used to work part time at a cake store when I was in college a loooong time ago.
There they had a cake called “Napoleon” which looked very much like this.  It was about $4.50 per piece at that time and was always majestically placed at the top corner of the shelf, making all the other cakes fainter, it’s dignified appearance made to look that way at least to me.  If I get lucky, I could take some of the unsold cakes home for free but Napoleon was never an option because it ALWAYS sold out.  I wonder if it is still keeping its position in the store after this many years…


This is actually my second try making a dessert with these milk, evaporated milk, sweet condensed milk and whipping cream combination.  Here is my “Cuatro Leche Quick Sundae” that I made last year, in October.


For this, I used lady fingers instead of Graham crackers.
Just soak them in the same mixture for a few seconds and randomly lay in the serving bowl.  Top them off with chopped strawberries and vanilla ice cream!
Since it takes no time for assembling each serving,  this dessert saves time and labor especially when entertaining many guests.


Posted in Uncategorized | 12 Comments

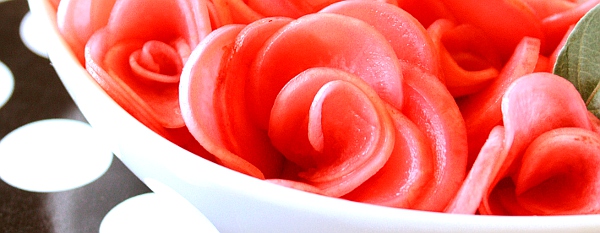
Pickled Radish Roses

It was quite a night with storm after storm after storm.  The hail was as big as golf balls at one point.  Since there were non-stop tornado warnings through the night, we slept in the back room of our basement where it was the safest.  Now, outside is unbelievably calm and I hear birds chirping from everywhere.  Luckily, we didn’t have much damage except the broken light fixture in the front yard and several dents in my husband’s car, but I’m afraid that more will be found soon after we do a more thorough inspection.


Today, I’m going to show you a super eye-catching side dish I made last year.
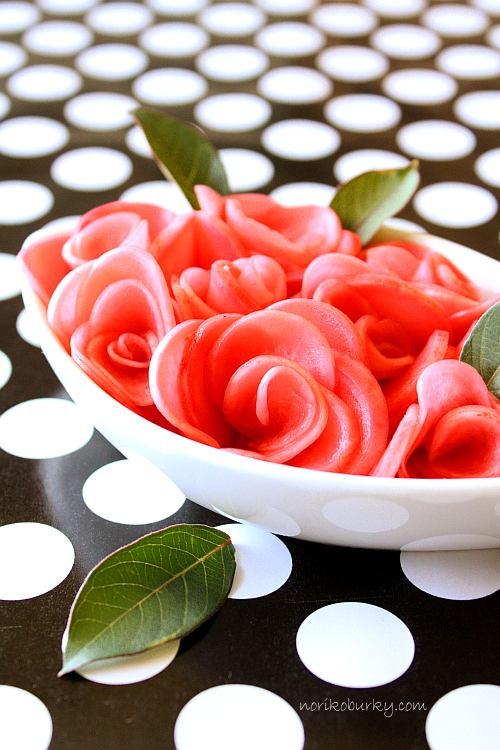
I came up with this recipe a few years ago, and because of the easiness, I have made it numerous times.  Usually, I just serve the pickled radish slices in a small bowl as a side of a meal for refreshment.  Its naturally pretty pink color in various shades provides a fancy element to the table.  This time I challenged myself to go another mile to make these pickles more dramatic.


Pickled Radish Roses

Pickled Radish Roses
5.0 from 2 reviews
Print
Recipe Type: Condiment
Author: NorikoBurky
Prep time: 5 mins
Total time: 5 mins
Serves: 3~4 people
Super simple, eye catching result.
Ingredients
  • 8-10 radishes
  • 3 Tbsp vinegar
  • 1 Tbsp sugar
Instructions
  1. Slice radishes thinly.
  2. Put vinegar and sugar in a plastic bag. Close the top tightly, shake vigorously to dissolve sugar. Add sliced radish.
  3. Squeeze out as much air as possible. Refrigerate for 5-10 hours.
  4. (It will make a nice refreshing side dish. Just serve small portions in individual bowl as it is.)
  5. Take a slice and roll it up tightly. Take another slice and roll it around the first one. Keep covering it up with a slice at a time, overlapping partly, arrange them to a rose shape. Place it in a small bowl. Make as many roses as you want or until the bowl gets full.
Notes

It is easier to start with the thinnest slice to form a center of the rose. As you proceed, alternate thin slice and thicker slice randomly in order to create more realistic effect.


The thinner the slice is the shorter time it takes for pickling.  Though, I find it almost impossible to cut each slice equally.  On the other hand, slices that are slightly different in thickness gives a more warm handmade unique look when creating roses.


Growing up on Japanese food and flavoring, my first thought for this was that it might go well with many international cuisines.  However, if you are more familiar with vegetables pickled in vinegar with herbs and spices, you might find its taste too bold.  Or if you have your favorite pickling recipe, go ahead with it and enjoy the dramatic presentation that radishes offer.

The pickling process doesn’t take too long.  You will see the radishes turning a soft pink in a few hours and it’s ready to eat.  Although the pickling time is 5-10 hours in my recipe, I recommend to wait from 12 to 24 hours if time allows.  By that time, the skin loses its color and merges with the whole pickle color just like in the picture on the top.


********************************************


Let me share a fabulous Pad Thai recipe I found couple weeks ago and kept wanting to make for days!  The recipe is made by Alice from Savory Sweet Life.  She is a passionate cook, an active star blogger, and a wonderful mom.  I can honestly say that her enthusiasm toward everything has given me a push when I was wondering if I should start my own blog.  I’d like to send a sincere gratitude to her for this super delicious recipe.

For a long time, I didn’t doubt even a bit that peanut butter was the key ingredient in making Pad Thai sauce.  Please don’t ask me where on earth I got this idea because I don’t even know.  So with that firm belief, I fell in the dilemma of using what I thought was the right ingredients, but the result was always too sticky and the peanut was over powering in flavor.

Alice’s recipe which uses tamarind juice concentrate and palm sugar was truly eye opening and guided me through an adventurous journey of these new ingredients.

If you want to see her detailed recipe, click the link below!

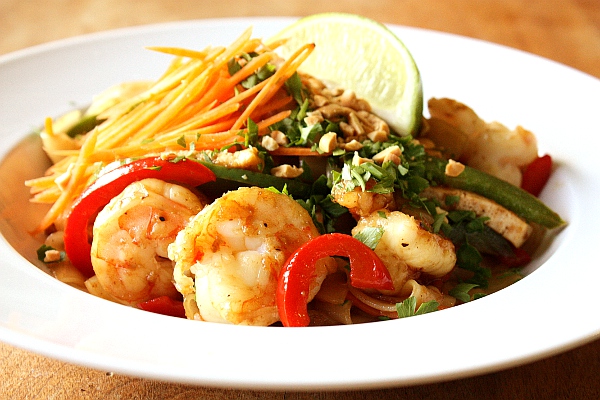
A favorite Thai stir fry noodle dish at home: Pad Thai Recipe


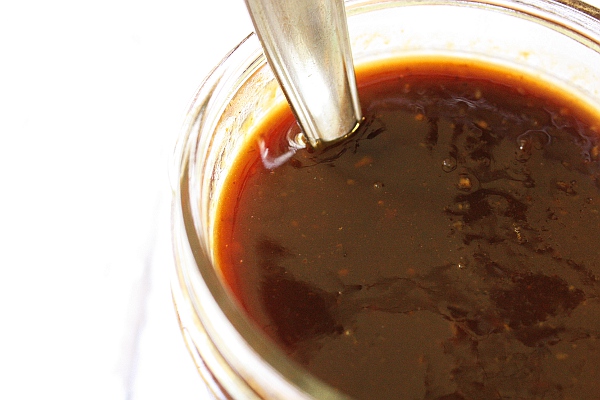
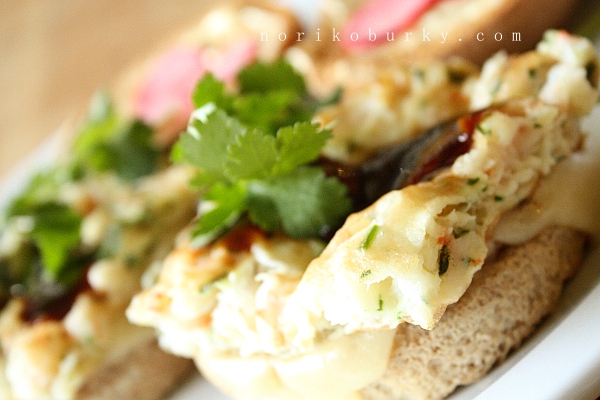
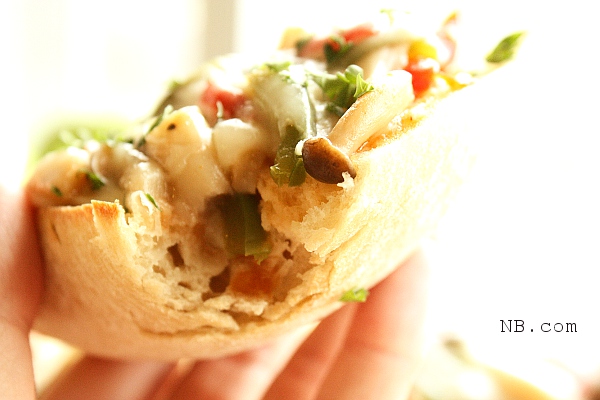
I made 1 1/2 cups of sauce and the good news is that you can refrigerate it up to a month.  I have a feeling that this masterpiece sauce will turn so many foods into divine dishes.  As my first try with this sauce is “No-Yolk Shrimp Omelette Sandwich” as you can see in the picture below.


First, I mixed liquid egg whites, chopped shrimp, minced cilantro, salt and white pepper.
Cook it in a frying pan then cut it to a size that fits nicely in a bun.  Toast the buns, place a slice of Swiss cheese to melt, add the omelette and rub some of the Pat Thai sauce on top.
I love this kind of fusion cooking in which different cuisines from different parts of the world meet.  I also put my “Picked Radish” in the sandwiches as a substitute of pickled cucumber.  It was pretty to the eyes and added nice crunchiness.


I wish I had taken these potted flowers in before the storm…
Now most of the flowers are gone and the leaves are painfully torn.
Hopefully, the roots are still healthy and will grow back soon.


Posted in Appetizer | 28 Comments

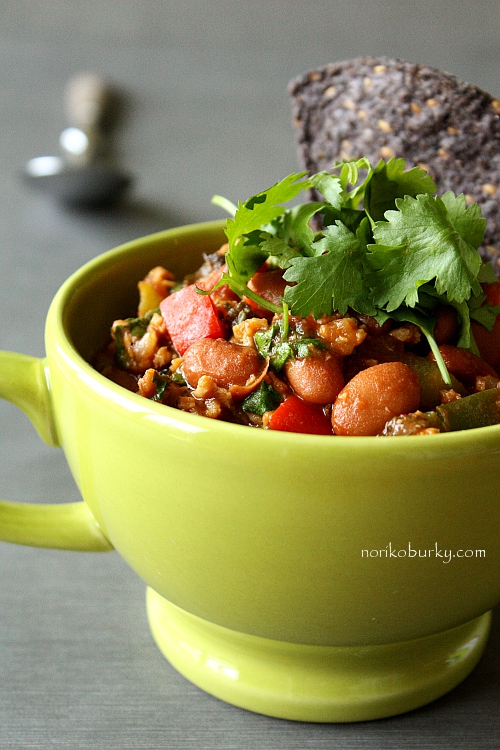
Smokin-delish Vegetarian Chili Beans

Don’t you love having cheerfully colorful munchy food as a part of your meal?
Just including some light finger-food on your plate can instantly turn a regular meal into a family party.

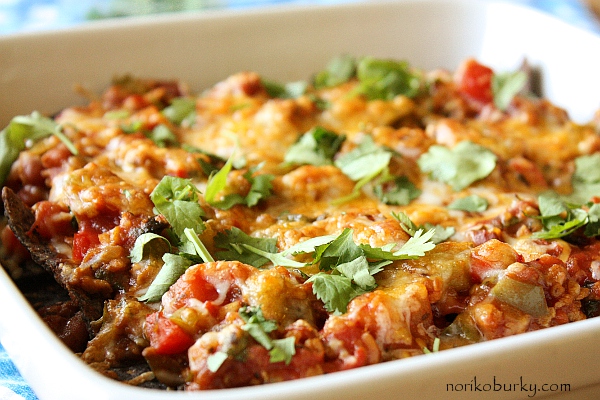
Tonight, I made my family style nachos.  Leaving the evaluation to my readers of “is it bad-boy enough?” like I mentioned at the end of my last post, I think it came out very good.

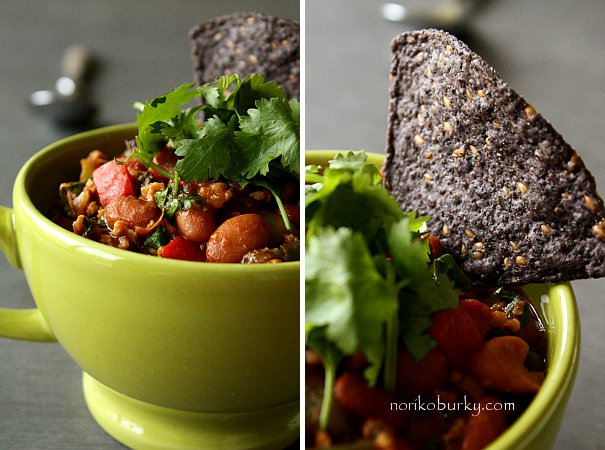
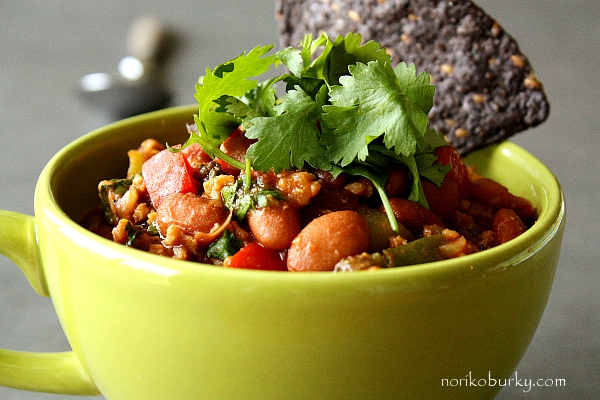
I started with blue corn tortilla chips on an oil-sprayed casserole dish, and poured my “Smokin-delish Vegetarian Chili Beans” generously on top.  I then added store-bought peach & pineapple salsa and sprinkled shredded cheese on top.  Baked it in 450 degree oven until chips are nice and warm and the cheese is well melted.  Sprinkle chopped cilantro for freshness.

Let me share my “Smokin-delish Vegetarian Chili Beans” with you today.
It’s interesting when I think of it, but I’ve never once made Chili with real meat, while I have a good number of experiences in both making and eating someone else’s vegetarian versions.   My husband makes no-meat chili using Guiness which is absolutely exquisite!  Yet, I think my chili, which I’m about to share, is as good as his to be humble, and I want to scream that it’s out of this world good toward the bottom of the well just like the barber in the Greek Myth “The King MIDAS has Donkey’s Ears”.


Smokin-delish Vegetarian Chili Beans

Smokin-delish Vegetarian Chili Beans
4.5 from 2 reviews
Print
Recipe Type: Entree, Main
Author: NorikoBurky
Prep time: 15 mins
Cook time: 25 mins
Total time: 40 mins
Serves: 3-4 people
Healthy and hearty meat-free Chili Beans.
Ingredients
  • 1/2 onion, chopped
  • 5 cloves garlic
  • 2 Tbsp olive oil
  • 1 tsp steak seasoning
  • 1 tsp liquid smoke
  • 1/2 cup textured vegetable protein (TVP)
  • 1/2 tsp salt
  • 1/4 tsp black pepper
  • 1 green bell pepper, cut into small pieces
  • 1/2 red bell pepper, cut into small pieces
  • 1 can (14oz) whole tomato, tear into small pieces by fingertips
  • 1 can (15oz) pinto beans
  • 1 cup water
  • 1 vegetable bouillon, crumble into small pieces.
  • 2 Tbsp tomato paste
  • 1/2 Tbsp ground cumin
  • 1/2 Tbsp ground coriander
  • 1/2 tsp red chili powder
  • 1/2 Tbsp Worcestershire sauce (may contain anchovies)
  • 1 1/2 tsp brown sugar
  • handful fresh cilantro, chopped
Instructions
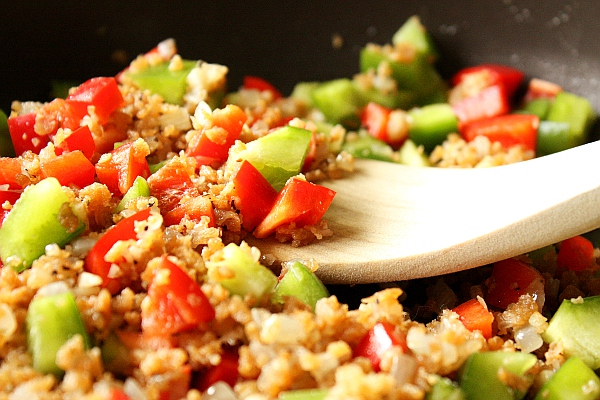
  1. In a pot, heat olive oil over medium heat. Cook onion and garlic until onion is translucent but not burned. Add steak seasoning, liquid smoke, TVP, salt and black pepper. Stir well. Add bell peppers, cook another minute.
  2. Add rest of the ingredients except chopped cilantro. Mix them well and simmer uncovered for about 20 mins. stirring occasionally.
  3. Remove from heat, mix in chopped cilantro. (Leave some cilantro for garnish.)
Notes

This recipe is made on the mild side, adjust the amount of red chili powder for your taste.


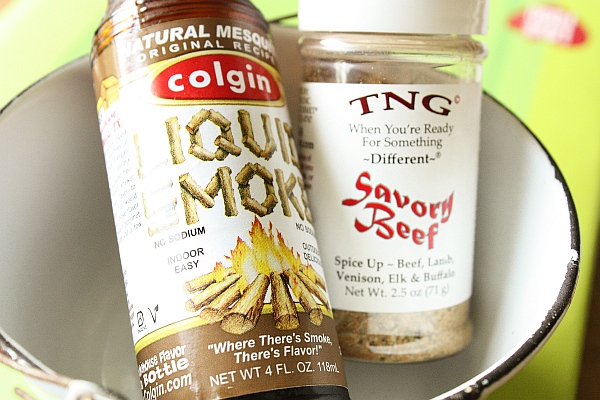
When making meat free chili, it’s a challenge to produce the scorchy appetizingly complicated flavor that only animal products can make.  Well, these items which you can easily find in the spices & sauce isle in grocery stores can make it happen with no effort.

I can see those outdoor grillers making faces at liquid smoke.  Yes, I do agree it is not quite the same as grilling, but it’s a very convenient and effective magical ingredient to have if you are cooking in your kitchen.  You can also avoid all the hassles you would have to go through with a smoke detector going off on you.  Hwoo woo woo…


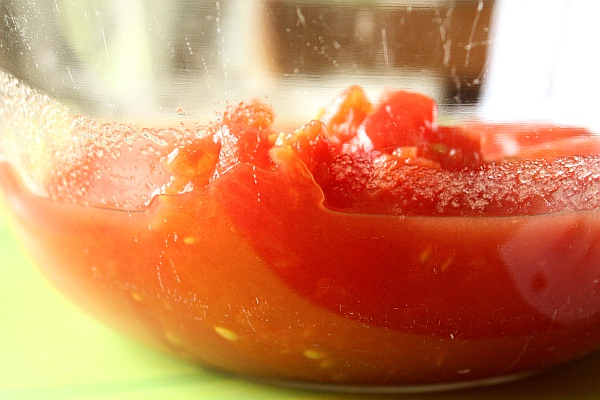
We are spoiled when it comes to canned tomatoes.  They come in all kinds of shapes and styles.  Among those, my favorites are stewed tomatoes and whole tomatoes that have already done most of the preparation but still allow you to play around with.

In this recipe, I used whole tomatoes but you can substitute with crushed tomatoes or small diced tomatoes.  I just personally preferred whole tomatoes to tear then into pieces for irregular sizes for the look and the fun texture to enjoy every bite.


I bought this Blue Corn Chips with White Flax Seeds from Target.  It’s their Archer Farm brand, two bags for $5 or so.  I have to completely agree with my husband that this is THE best store-bought corn chips we ever had so far.  The amount of salt they use is so well under control and the nutty flavor that flax seeds adds to it is very satisfyingly flavorful.


P.S.  You can now write comments in Japanese, also.
My apologies to those whose comments could not be shown correctly.
日本語書き込みもオッケーになりました。
これまで文字化けしてしまったコメント主さま、ごめんなさい。

Posted in Appetizer, Snack | 13 Comments

Bulgur Wheat & Orzo Salad with Cucumber Yogurt Sauce

Easter is approaching along with this kind yet temperamental spring weather.

A girl next door knocked on our door late this afternoon.  My son had gone fishing with his daddy so I felt sorry for having to tell her that he is not home to play.  She didn’t seem disappointed by my answer and asked me if I wanted to come see baby bunnies.  In my experience, a baby bunny was about the size that fits nicely in my palm, but soon I realized that she really meant “baby” bunnies.

We walked to the side of her house on the slope that leads to the backyard and she yelled “there!” pointing her finger toward the side of her house’s concrete base wall.  All I could see was a small pile of straw.  She then carefully rake away the straw with her small hands.  Underneath was a fuzzy layer of white fur.  It took me another 20 seconds to notice those little tiny ears about the size of my pinky fingernail.  We didn’t want to disturb their comfortable environment and as importantly, didn’t want to scare the mommy rabbit, who was very likely watching her babies safety.  So it’s only my guess measuring from the size of their ears I saw, they must be as little as golf balls.

It’s partly surprising to see them surviving through already a couple lawn mowings, and heart-warming to see all the protection the mommy rabbit has given to them.
I hope to see then hopping around here soon and seeing their mommy rabbit almost losing herself just like I do…


There goes another happy Sunday afternoon…
I thought a fun and easy and nutritionally loaded dinner would be perfect.


For the main entree of tonight’s meal, I chose bulgur wheat which is abundant in protein and fiber.  Also rich in B-vitamins, which I learned about a lot from SUNNYLAND MILLS and over-simplified the details, thus my description lacks in lot more valuable information.

Seeking a more complicated and enjoyable texture, I added a small amount of orzo pasta.
Cooked them in bouillon together with butter, salt & pepper, it came out more than satisfying!


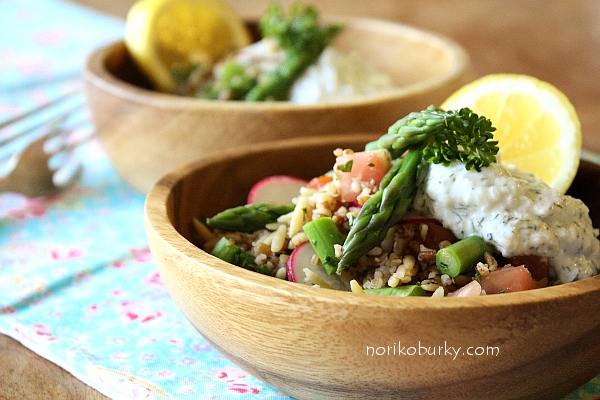
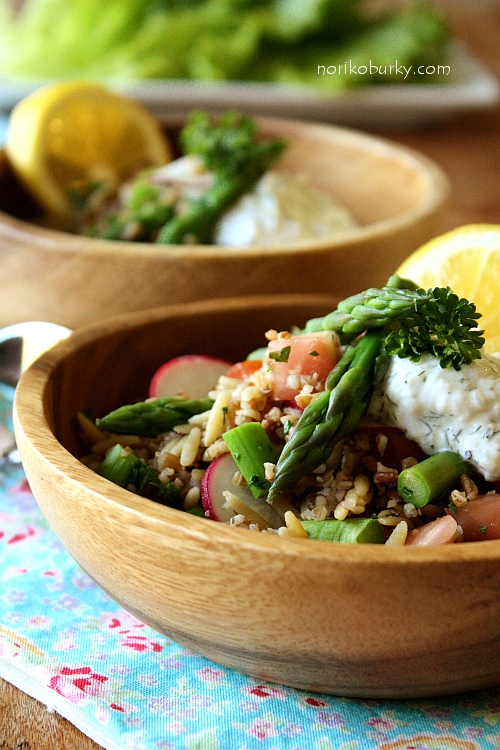
Bulgur Wheat & Orzo Salad with Cucumber Yogurt Sauce


Bulgur Wheat & Orzo Salad with Cucumber Yogurt Sauce
4.7 from 3 reviews
Print
Recipe Type: Salad, Entree
Author: NorikoBurky
Prep time: 15 mins
Cook time: 10 mins
Total time: 25 mins
Serves: 2 yield
Flavor-fully cooked bulgur wheat and orzo pasta, mixed with fresh vegetables. Creamy yet refreshing cucumber yogurt sauce complements this healthy dish to its best.
Ingredients
  • 1/2 cup bulgur wheat
  • 1/4 cup orzo pasta
  • 1 Tbsp butter
  • 1 vegetable bouillon
  • 1/4 tsp salt
  • 1/4 tsp black pepper
  • 1 1/4 cup water
  • 1 cucumber
  • 1/2 cup 2% fat Greek yogurt
  • 1 Tbsp lemon juice
  • 1/2 Tbsp olive oil
  • 1/4 tsp garlic paste
  • dash of salt & pepper or to your taste
  • 1 tsp chopped dill, dry or fresh
  • 1 medium size tomato, cubed
  • 5 stems asparagus, cut into 1/2 inch long, blanched and drained
  • 3 radishes, sliced
  • 2 Tbsp chopped parsley
Instructions
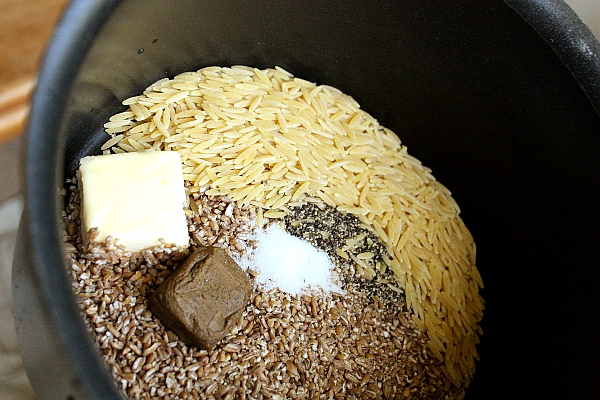
  1. In a 3qt. pot, put bulgur wheat, orzo pasta, butter, salt & pepper, vegetable bouillon and water. Bring it to a boil uncovered over high heat. Stir well to make sure bouillon is completely dissolved.
  2. Turn the heat to medium-low, put the lid on, simmer for 9-10 mins. Let it stand for 5 mins. with the lid on., Fluff it up with a spoon, cool it down while preparing the rest of the dish.
  3. Now for the sauce, peel cucumber, cut it in half lengthwise. Remove the seeds with a spoon and grate it. Spread a cheese cloth over a bowl, pore in grated cucumber on it. Gather all four corners of the cloth and squeeze out the juice. Discard the juice.
  4. Combine grated/drained cucumber with Greek yogurt, lemon juice, olive oil, garlic paste, dill and salt & pepper. Keep it in refrigerator until served.
  5. Once the cooked bulgur wheat and orzo pasta are cooled enough, mix in tomato, asparagus, radish and parsley. Serve it with the cucumber yogurt sauce.
Notes

This can be made in numerous variations. Replace the vegetables with your favorites or what you have in hand.

Make sure to dissolve bouillon in step 1, otherwise it won’t be flavored evenly and very likely burn the bottom because of bouillon sediments.


Have bulgur wheat, orzo pasta, butter, vegetable bouillon, salt & pepper ready in a pot.
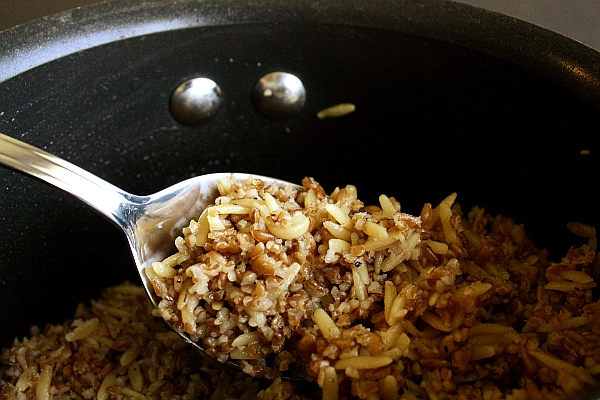
Then add water.  Cook it and let it stand for steaming.


This is how it looks after cooking and fluffing it up.


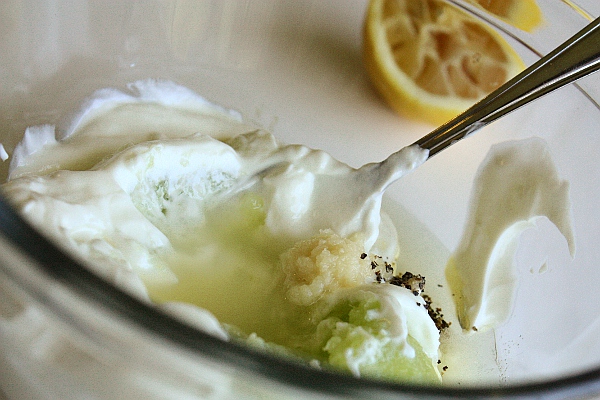
Make the sauce by combining cucumber, Greek yogurt, olive oil, lemon juice, garlic paste, salt & pepper and dill.  You can make the sauce while cooking the grains as above, but I preferred to do each step in a take-it-easy Sunday way.  Take my time and keep a close eye to each step.


Accompanying with cucumber yogurt sauce (tzatziki sauce) turned out marvelous.
They complemented each other in taste and texture.

Dinner was completed with slices of bread and chips & salsa.
We had blue corn chips that has dots of white sesame seeds, (later I found out that it was FLAX SEEDS) and we became fans of it right away.  Maybe I will make nachos in a “bad boy” style tomorrow with them.


P.S.  You can now write comments in Japanese, also.
My apologies to those whose comments could not be shown correctly.
日本語書き込みもオッケーになりました。
これまで文字化けしてしまったコメント主さま、ごめんなさい。

Posted in Entree, Salad, vegetables | 10 Comments

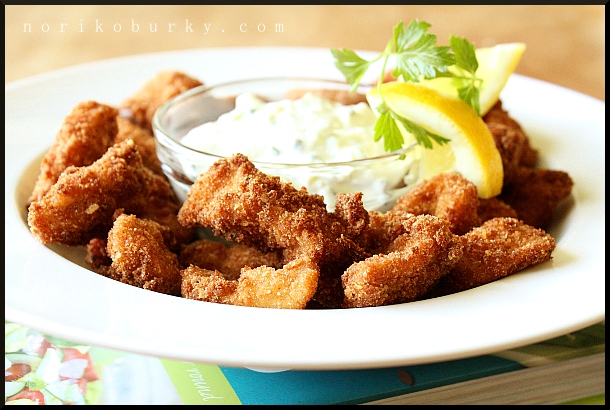
Popcorn Chicken with Gorgonzola Dip

Thank goodness it is getting easier each day to wake up in the morning because of the weather.  Every morning, out of habit, I still swear to my bed who has just lost its owner that I would come back later for 20 minutes of indulgent comfort.  However, a quick glance at the blue sky through my kitchen windows with white airbrush-like jet lines is startling enough to perk me up.  It’s funny, no matter what kind of weather it presents outside, I am convinced that it is perfect weather for a cup of hot coffee, looking outside every day.

Let’s move on to food talk.  Today was my big grocery shopping day of the week.  Not that I do this once a week -I’m rather a daily shopper who finds herself wasting more money on unnecessary things if she tries to purchase for a week-long menu.- just it was a day that the store I have been a long-time customer had fresh vegetables, and I needed to buy a lot of other stuff in my “to-buy list”.

The problem at times like this is that there are too many choices as to what to cook with a refrigerator full of stuff waiting to be presented beautifully.  Should I make the Mexican Samosas that I was thinking of last night?  What about the spinach recipe which I luckily came across while reading blogs?  After thinking it over for several minutes in my head, I remembered the chicken stick recipe one of my girlfriends shared with me the other day.  Cut chicken breast into strips and fry after coating -this part is her very her own creation- in croutons.  That’s it!  Sounds like a recipe my son is going to dive into!


You must be wondering how chicken sticks turned out to be so popcorn-y like those.  Right before starting to cook, I was flipping through “”Food and Wine” magazine which I started subscribing to as a part of school fund raising program a friend of my son’s is involved in.  There I saw a super delicious looking chicken cooked Chinese style.  There, chicken was cut like these and obviously, it must have stayed with me subconsciously.  Oops!  I was supposed to cut it into strips!  Not small pieces!  You can’t cry over already cut chicken.  (Wish there was a way to patch them up though :))  So this recipe came up by mending a mistake, and you know what?  It’s so easy and I’m loving it!


Popcorn Chicken with Gorgonzola Dip

Popcorn Chicken with Gorgonzola Dip
Print
Recipe Type: Appetizer, Snack
Author: NorikoBurky
Prep time: 10 mins
Cook time: 10 mins
Total time: 20 mins
Serves: 2-3 people
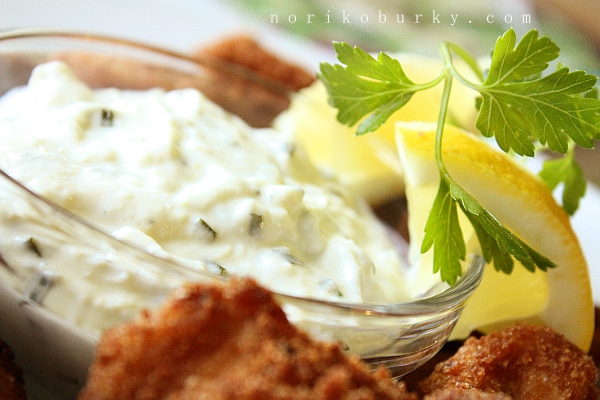
Bite size chicken cooked crispy. Enjoy with the rich and chunky Gorgonzola dip!
Ingredients
  • 1 boneless skinless chicken breast
  • 1 egg
  • salt & pepper
  • 1 cup plain bread crumbs
  • canola oil for frying
  • 1/2 cup crumbled Gorgonzola cheese
  • 1/4 cup sour cream
  • 1/4 tsp lemon zest
  • 1 Tbsp lemon juice
  • 2 tsp dry chopped chive
Instructions
  1. Cut chicken breast into small pieces.
  2. Break egg in a bowl, add salt & pepper, stir well. Soak the chicken pieces in the egg.
  3. Prepare bread crumbs in another bowl. Put the chicken pieces in bread crumbs after draining excess egg. Coat bread crumbs on every piece of chicken by tossing by hand.
  4. Heat canola oil in a frying pan or a 3qt. pot about an inch deep. Fry chicken pieces over medium-high heat. Drain excess oil on a paper towel.
  5. Now, prepare the dip. Combine crumbled Gorgonzola cheese, sour cream, lemon zest, lemon juice and chive in a heat resistant bowl. Cover it with wrap, microwave it for 40 seconds on high. Stir well.
Notes

If you fry chicken in a 3 qt. pot, fry them in two batches.

Use oven mitts or a kitchen towel when you take the dip out of microwave as it is very hot.


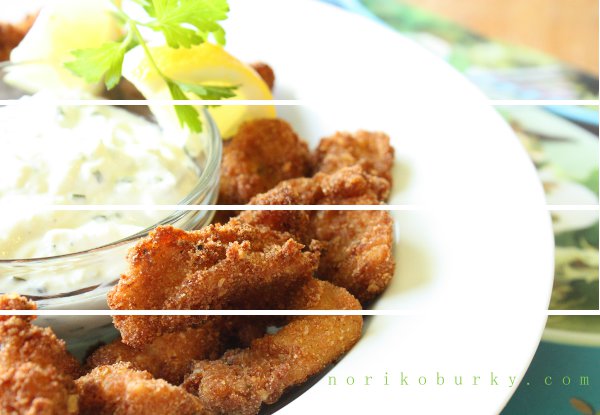
What I love most about cooking tiny pieces of meat is that you don’t have to worry about not having them cooked through.  (I haven’t quite completely recovered from the traumatizing drum stick incident from the other day…) It takes only a few minutes on each side before they become golden brown and meat is well-done by that time.   Also being able to  consume the hole package in a bite works so well for my son with braces.


I often keep some kind of crumbled cheese in my refrigerator that comes in a plastic container with a resealable lid.  Gorgonzola, Bleu cheese and Feta are commonly placed in the dairy product isle of most supermarkets.  They are quite affordable and come in handy for topping off simple green salad, sprinkling over tomato sauce, etc…


American bread crumbs are almost interchangeable with Japanese Panko but more grainy and coarse.  I like having options on which one to use depending on the crunchiness you are looking for.
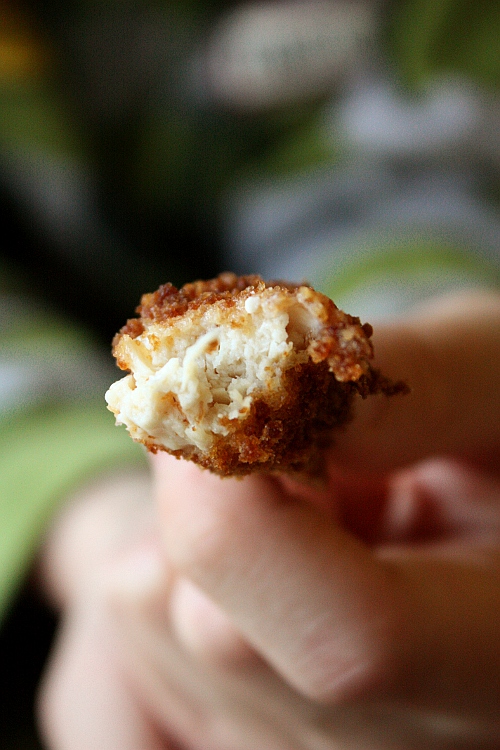
The chicken came out as juicy and tender as I hoped for.  It was hard to stop munching as I cooked.  That’s how my dishes, all the time, turn out smaller in portion than they are supposed to be.


Here’s our kitty, Genji, taking a cozy afternoon nap…
Just seeing his happy nappy face assures me that he trusts us 100% and likes being here.
He came from one of our neighbor’s when the mommy cat had babies.
His mom is an indoor/outdoor cat and we see her sitting in her driveway or sometimes strolling around the neighborhood.  It’s really nice to know that Genji has his mommy so close.  I wonder if they would recognize each other if they met after almost two years.  It would be nice if they did…


P.S.  You can now write comments in Japanese, also.
My apologies to those whose comments could not be shown correctly.
日本語書き込みもオッケーになりました。
これまで文字化けしてしまったコメント主さま、ごめんなさい。

Posted in Appetizer, Snack | 14 Comments

Creamed Avocado and Lime Chilled Pasta

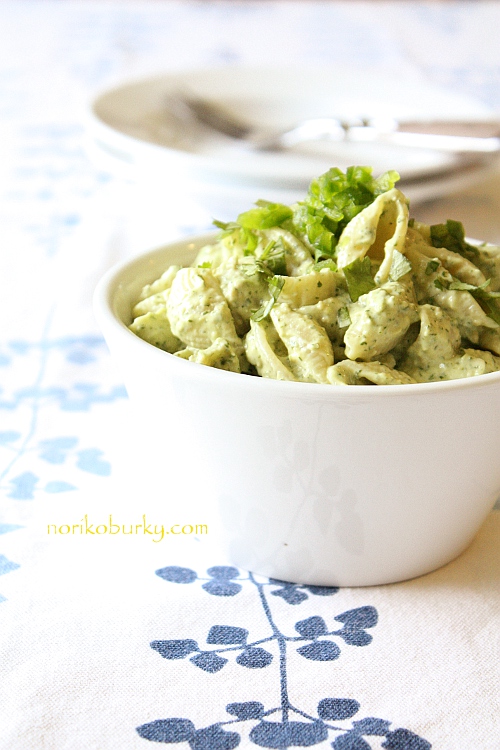
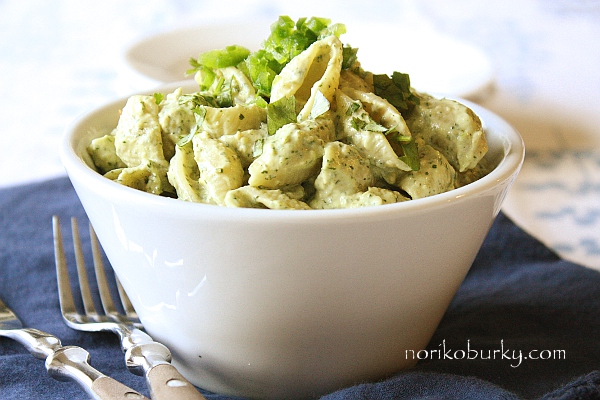
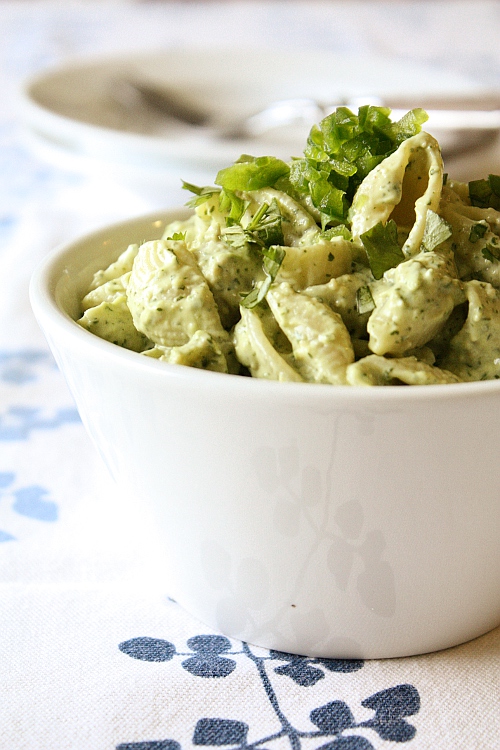
If you are feeling that you are running out of creamy pasta recipes, or simply want to try something new, what about this one which is made of creamed avocado.  I like fresh avocado in a big salad or guacamole style, but thought one day it’s a shame not using this super nutritious tropical fruit in other ways.  Warm seasons are already around the corner where getting ripe avocados is easier and they get more affordable.  Why not give this butter in the field some fun twist?


Creamed Avocado and Lime Chilled Pasta


First and foremost, you will need a ripe avocado.
Cream it together with a bunch of cilantro, lime juice and mayonnaise.
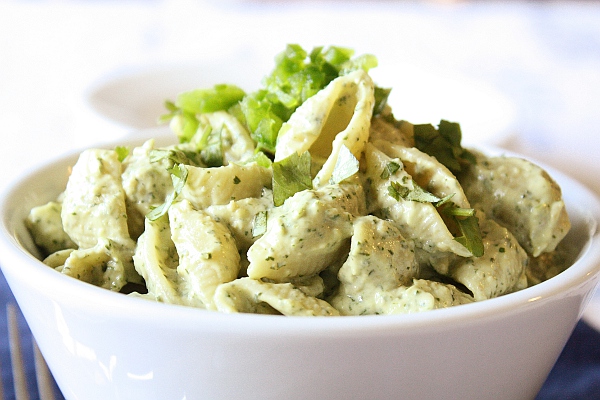
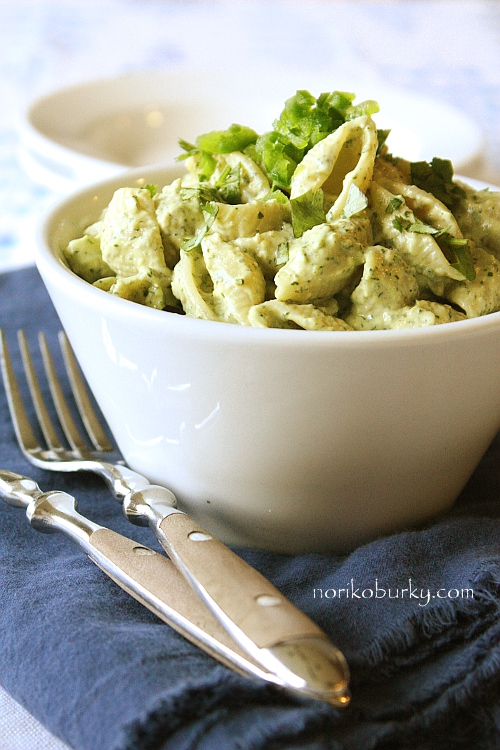
The photos do not justify this springy spirit-lifting green color!
It’s so silky and decadent, my family and I highly recommend trying it!


Creamed Avocado and Lime Chilled Pasta
Print
Recipe Type: Main
Author: NorikoBurky
Prep time: 5 mins
Cook time: 12 mins
Total time: 17 mins
Chilled pasta coated with a simple-tasting creamed avocado sauce.
Ingredients
  • 1 1/2cup dry shell pasta or short pasta of your choice
  • 1 ripe avocado
  • handful of cilantro, roughly chopped
  • 1 1/2Tbsp lime juice
  • 3Tbsp mayonnaise
  • 1tsp garlic paste
  • salt & pepper
  • chopped cilantro and/or jalapeno for garnish
Instructions
  1. Cook pasta according to the package instructions. Drain well, set aside to cool.
  2. Peel avocado and remove the pit. Put it in a food processor together with chopped cilantro, lime juice, mayonnaise and garlic paste. Blend it until it’s creamy. Add salt and pepper to taste. (Cover it with plastic wrap and keep it in a refrigerator if you have time.)
  3. Transfer the avocado sauce to a medium sized bowl. Add cooked pasta and toss them well. Sprinkle chopped cilantro and/or jalapeno on top.
Notes

I used chopped jalapeno on top for garnish but you can also put jalapeno in a food processor to blend in the sauce for spiciness.


As I mentioned in the last part of the recipe, I chose to use chopped jalapeno as a garnish so my son who has not yet built up his tolerance to heat can have options.

Ina Contessa of “Barefoot Contessa” (who I adore from the bottom of my heart, by the way) once said on her show that she thinks there are two kinds of people in the world: ones who like cilantro and ones who don’t.  I’m one of the first ones.  It is a kind of herb I preferred not having it in my food before, but somehow along the way of my life, this worldly familiar herb got me in its whelm.  The fresh smell of cilantro while chopping takes me to a happy cooking wonderland right in my kitchen.  Also, when it gets bruised during chopping, it lets you know that your knife needs to be sharpened.  Even with a very sharp knife,  chopped cilantro darkens in color after a while so I normally chop them up right before garnishing.


This dish, I made a few days ago when we were enjoying summer-like whether, makes a perfect side dish or a part of a nice entree in warm seasons.  Or you can add other fresh vegetables such as tomatoes and cucumbers and cubed ham or crispy bacon chips to make an elegant salad.


On the other hand, chilly weather came back today.
As it always happens at the ironically right moment, our furnace was not cooperating with me and wouldn’t kick on.  Cold but not bad enough to start a fire…
I dragged a jacket from a pile of winter clothes in my closet,
brought my favorite blanket downstairs and cuddled in the sun with a book.
It was such a peaceful moment and felt almost like it was a sin to ruin by worrying about the laundry and all the tedious choirs.  Trust me I do not make that kind of crime.


P.S.  You can now write comments in Japanese, also.
My apologies to those whose comments could not be shown correctly.
日本語書き込みもオッケーになりました。
これまで文字化けしてしまったコメント主さま、ごめんなさい。

Posted in pasta & other noodles | 6 Comments

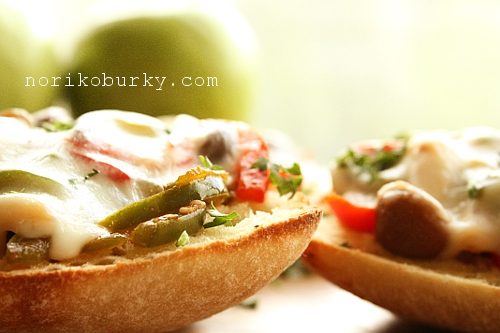
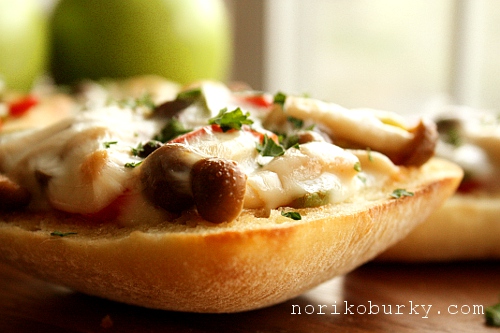
Japanese Cheese-Melt Open Sandwich

My dad worked as a car mechanic for more than 50 years until he retired a few years ago. He had his own shop right next to the house, and I spent a lot of time there as a child.

Every fall, he goes to the mountains to pick wild mushrooms.  He comes home with a couple bagfuls of at least five different kinds of mushrooms. I went with him sometimes, but all the ones I pointed out were not edible/poisonous. I soon realized that good-to-eat mushrooms are the ones usually hidden under fallen leaves.

Since not many people could tell edible wild mushrooms from non-edible ones, his harvest was always well appreciated by our neighbors.  Then they would kindly return the favor with something from their hobby/specialty.  I miss those days.

It’s been a while since seasonal vegetables – not only mushrooms – became available at stores all through the year.  Although there are voices worrying about people losing their sense of the seasons, I enjoy taking advantage of farming revolutions 🙂

Shimeji mushrooms are one of my family’s favorite mushrooms.  Those tiny heads on top of long plump stems are pretty resilient in cooking.  Also, they don’t absorb too much sauce like button mushrooms or shiitake mushrooms.


Japanese Cheese-Melt Open Sandwich
-with Japanese BBQ Stir-Fried Veggies-

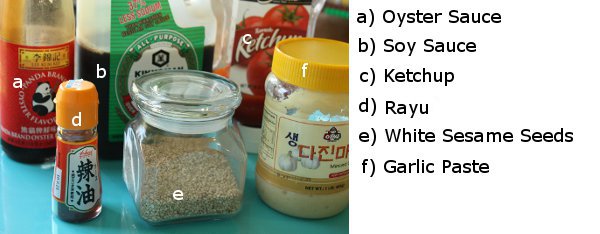
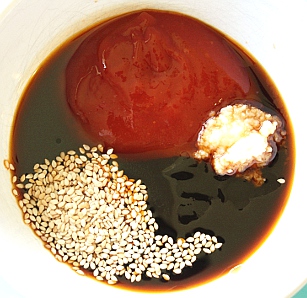
-Ingredients for Japanese BBQ Sauce-


*Rayu is a spicy sesame oil and comes in a small 1 oz bottle.

Mix them all well…

Shimeji mushrooms look like this.
Aren’t they darling?


Japanese Cheese-Melt Open Sandwich
Print
Recipe Type: Main
Author: NorikoBurky
Prep time: 5 mins
Cook time: 10 mins
Total time: 15 mins
Serves: 2
Stir-fried vegetables mixed in homemade BBQ sauce. Toasted on ciabatta bread with a slice of cheese.
Ingredients
  • 1pkg (3.5oz) Shimeji mushrooms
  • 1/2 red bell pepper
  • 1/2 green bell pepper
  • 1Tbsp salad oil
  • salt & pepper
  • 2Tbsp oyster sauce
  • 3Tbsp ketchup
  • 1 1/2Tbsp soy sauce
  • 1 1/2tsp garlic paste
  • 5-6drops la-yu
  • 1tsp white sesame seeds
  • 1Tbsp margarine
  • 2 ciabatta bread
  • 4 slices of provolone cheese
  • 1Tbsp chopped parsley for garnish
Instructions
  1. Cut off about one inch from the bottom of the Shimeji mushrooms. Separate stems gently.
  2. Cut bell peppers into 1/8 inch strips.
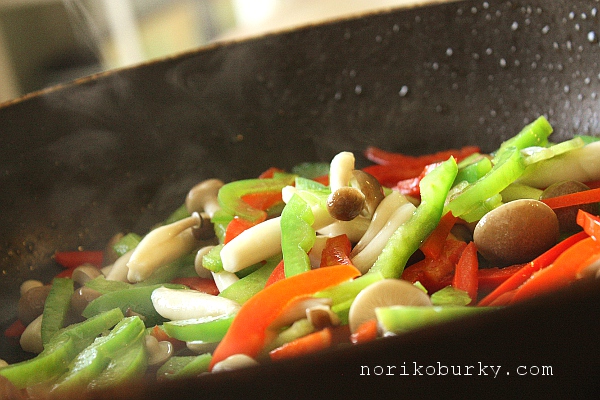
  3. In a small bowl, mix all the ingredients for the sauce. Set aside. Heat salad oil in a frying pan over high heat. Stir fry the mushrooms and bell peppers. Add salt & pepper lightly.
  4. Add the sauce. Remove from the heat and mix the sauce in with remaining heat.
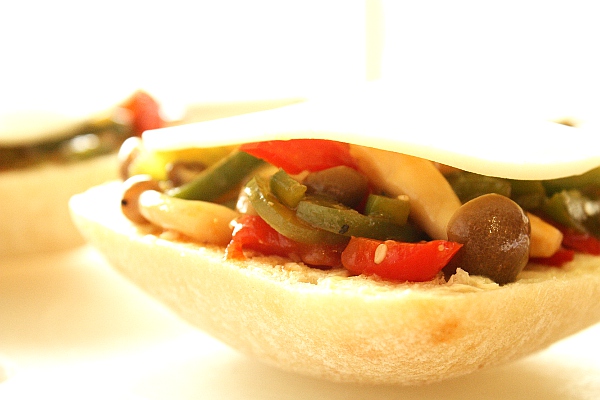
  5. Cut ciabatta bread in half cross wise. Spread margarine lightly. Put the cooked vegetables and lay provolone cheese on top.
  6. Toast them for 3-4 mins or until the cheese melt to your taste. Garnish with chopped parsley.


I spread margarine on the bread in order to avoid liquid from the veggies making them soggy.  You can also use mayonnaise and/or Dijon mustard instead.


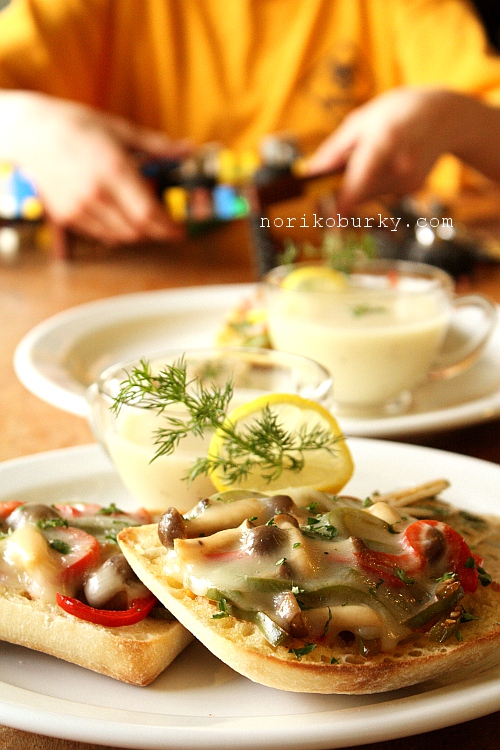
We had chilled potato soup and a simple salad with the sandwiches.
It’s hard to believe that a jacket was needed to go outside last week, now it’s above 80 degrees.  My favorite time of the year has arrived 🙂
Chilled soup is so pleasant at this time of year.

I said it’s dinner time, not LEGO time…

Wanna bite?


We replaced our old Hummingbird feeder with a new one.
Not so sure if they’ll come back with our curious kitty, Genji, being on guard.

Posted in bread | Comments Off on Japanese Cheese-Melt Open Sandwich

Shrimp, Dill and Capers Flat Cakes

The sky is blue and endlessly high, the sun is smiling, the air feels as clear as it can be.  In spite of all the blessings of early spring, it must have been one of those days that the cooking fairy had turned her back on me…

Let me save the shrimp talk (as it’s in the title) for later.  Instead allow me to mull over the chicken dish I worked hard on today. <sigh>

I first marinated drumsticks in a mixture of egg and ranch dressing.  While they were being marinated, I made the supposedly crispy-to-be outer coating with some ideas I collected in past recipes.  Generously coat the chicken in this dry mixture, then fry.  They turned out to be the look I was going for, BUT not cooked through.  I think there is nothing as disappointing in cooking as seeing abhorrently juicy chicken blood after a probing poke.  Wishful thinking, I wait for a few minutes hoping it gets cooked with the remaining heat in the meat.  Not gonna happen! Drawing at straws, I stick it in the microwave, then hear a loud “BOOM”.  Open the microwave door with fear…then close it as if I didn’t see anything…

Keep cooking.  Keep cooking. You have to put food on the table no matter what to feed hungry mouths, right?


Shrimp, Dill and Capers Flat Cakes


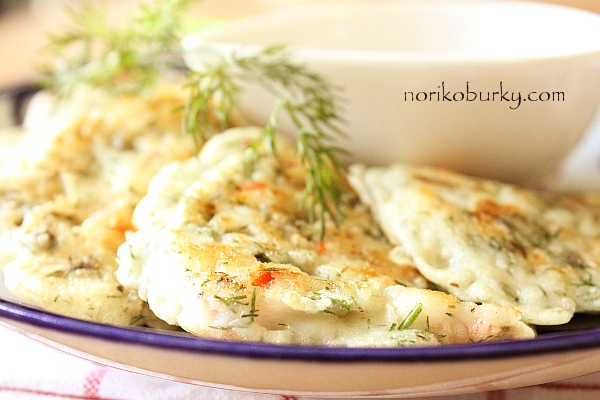
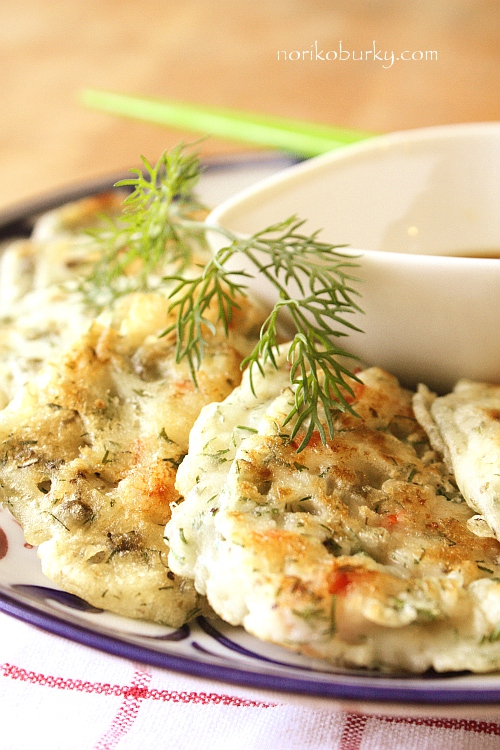
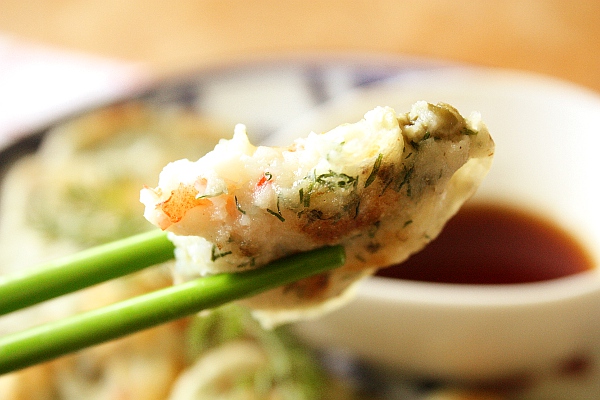
Eh-hem, <clearing throat> this recipe, I can proudly share with.  I have been lucky with -Shrimp, Dill and Capers Flat Cakes-, an Asian influenced dish made with a combination of multinational ingredients.  It is forgivingly easy for a cook who’s failed in one recipe 🙂


Shrimp, Dill and Capers Flat Cakes
Print
Recipe Type: Appetiser, Entree
Author: NorikoBurky
Prep time: 10 mins
Cook time: 8 mins
Total time: 18 mins
Serves: 10 patties
An Asian influenced simple dish made with a combination of multinational ingredients.
Ingredients
  • 8 medium size shrimps, shelled and deveined
  • 2Tbsp dill, chopped
  • 2Tbsp capers, minced
  • 3/4cup all purpose flour
  • pinch of black pepper
  • 2/3cup water
  • 1-2Tbsp salad oil for pan frying
Instructions
  1. Chop shrimps into small pieces.Run a knife through until it gets sticky.
  2. In a bowl, combine the shrimp with the rest of the ingredients except salad oil.
  3. Heat salad oil in a frying pan over medium-high heat. Scoop in the mixture to form 3 inch flat circles. Cook about 2 mins each side or until golden brown.
Notes

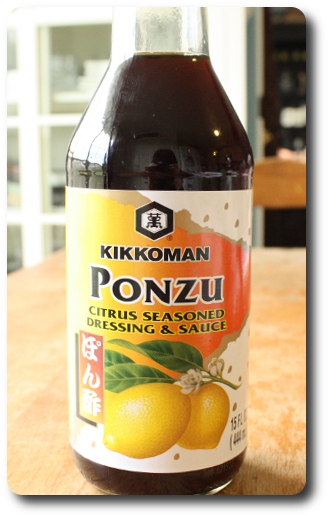
I served it with Ponzu -a Japanese soy sauce based dipping sauce with citrus flavor- for dipping this time. If you want to make it spicy, adding small amount of Japanese yellow mustard is recommended. I also tried with guacamole before and worked well, too.


There is an oriental grocery store about 10 minutes drive from my house.  Every Wednesday evening, fresh fruits & vegetables are delivered to the store.  Needless to say, the store gets packed with all the people at that time.  Although I crave fresh vegetables all the time, I get discouraged to drive there just thinking of the crowd.  It seems by now that the employees there recognize each customer by dividing them into two separate groups: the Wednesday people and the Thursday people.  I’m one of the latter ones.  Each group of people have gotten to know each other and the store provides us with a community place.  Having a chat there is a part of fun.  I got there on this Thursday soon after they opened.  Any foodies will easily understand the thrilling moment when I see and smell all the pretty fruits and vegetables!

Where am I going with this story? Oh yeah, DILL.  I always count on the fresh herbs they sell, so lively and calmingly aromatic.  As always, it came carefully packed in a huge bundle.  Since dill has such a strong characteristic smell, a little goes a long way in dishes.  So that’s when my big appetite comes in place, trying to come up with some good uses of it.


If I remember correctly, I started making this recipe two summers ago.  Without giving much thought to it, just mixed what I had in my refrigerator.  One of my blog friends was saying in her blog a while ago that often good recipes come out of spontaneous cooking.  I totally agree with her!  And that kind of unexpected moment gets us hooked on cooking!


The trick to this dish is how to chop the shrimp.  I would say half lumpy / half pasty?
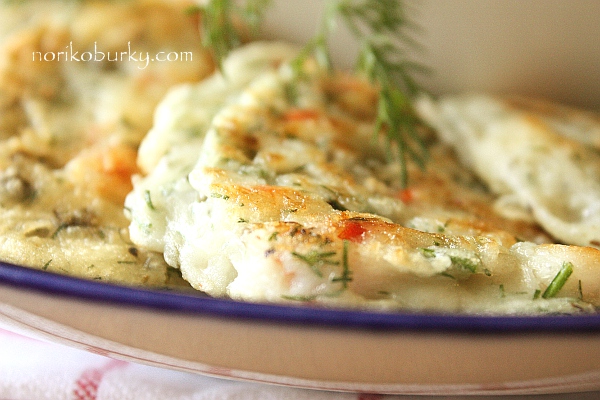
The saltiness and and sourness of minced capers work so perfectly that you don’t need any additional salt.  Isn’t the salmon-pink-color of the shrimp enticing?

They can be served either as a part of a meal or an appetizer.
They will also make a terrific accompaniment along with alcoholic beverages.


At last, we use this Ponzu for various sorts of dishes.
It is a wonderful dipping sauce for veggie/meat stuffed dumplings and also works in simply mixing in boiled vegetables.  Most oriental grocery stores carry this at their sauce isle.
Just give it a try if you have a chance!


Posted in Appetizer, Entree, vegetables | 3 Comments

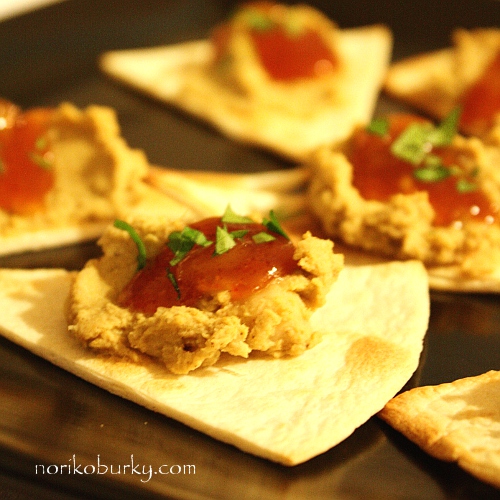
Indian Hummus with Mango Chutney on Tortilla Wedges

A fun part of making trips to a grocery store where you don’t go regularly is finding unexpected stuff.  Hummus is an example, along with some familiar flavor options like garlic, herbs, roasted bell pepper, etc…, finding uniquely flavored ones makes your trip worthwhile.

Just like white fish, hummus is like a white canvas to me.  It has tremendous possibilities for adding flavor and the cook’s personal touch.  (…and of course their cravings…)


Indian Hummus with Mango Chutney on Tortilla Wedges

Indian Hummus with Mango Chutney on Tortilla Wedges
Print
Recipe Type: Appetiser, snack, side dish
Author: NorikoBurky
Prep time: 5 mins
Cook time: 3 mins
Total time: 8 mins
Serves: 4-5 servings
Everybody’s favorite Middle Eastern dish with an Indian flavoring.
Ingredients
  • 16oz can Garbanzo beans
  • 1tsp garam masala
  • 1tsp coriander powder
  • 1tsp cumin powder
  • 1tsp garlic paste
  • 1tsp minced ginger
  • 2Tbsp Tahini sauce
  • 2 1/2Tbsp lemon juice
  • 2Tbsp water
  • 1Tbsp olive oil
  • salt & pepper to taste
  • tortillas cut into wedges
  • mango chutney for topping
Instructions
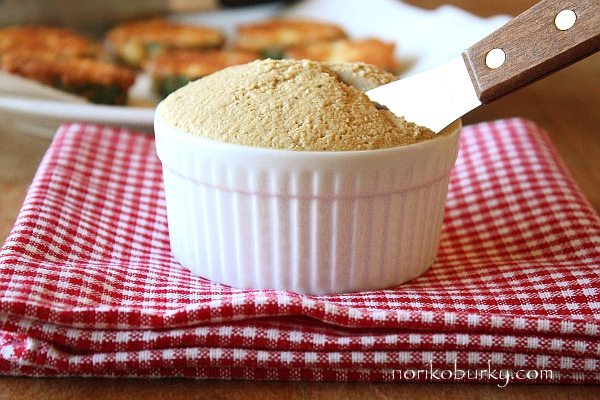
  1. Put all the ingredients from Garbanzo beans to salt & pepper in food processor. Puree it.
  2. Spread spoonful on each tortilla wedge and top off with mango chutney.


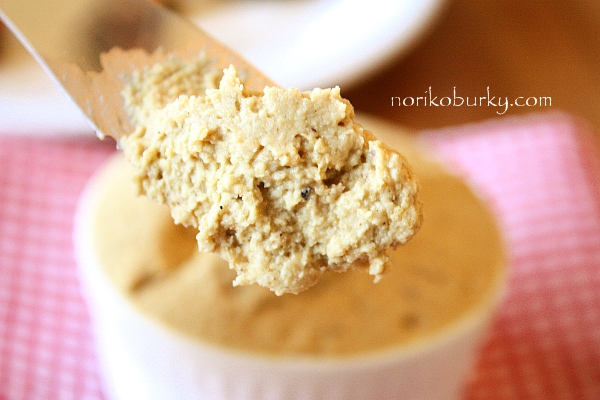
The picture above was actually taken the last time I made this, sometime back in December.  I used wedges of tortillas just because that’s what I had that day, but pita chips or toasted thin slices of baguette would work well, too.  I intentionally made this on the mild side for my son to enjoy, but topping it off with a bit of Mango Chutney gave it a convincing final touch.


“Indian hummus!  It’s so obvious!”  My husband says.  “They work so well when you think of it.  Why doesn’t anybody sell it?”  Blowing my own trumpet as the cook who made it, I wonder that, too 🙂


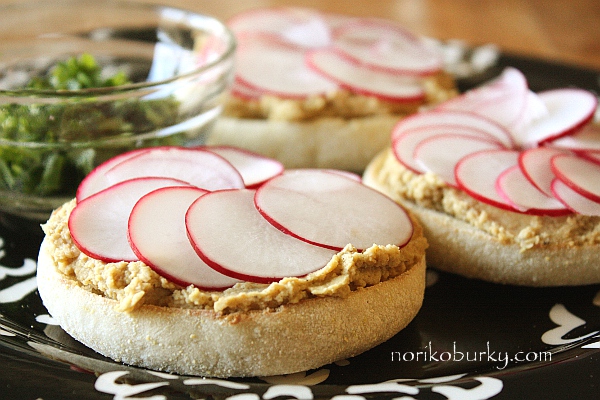
The picture below is part of the meal the next day, using the leftover Indian Hummus.
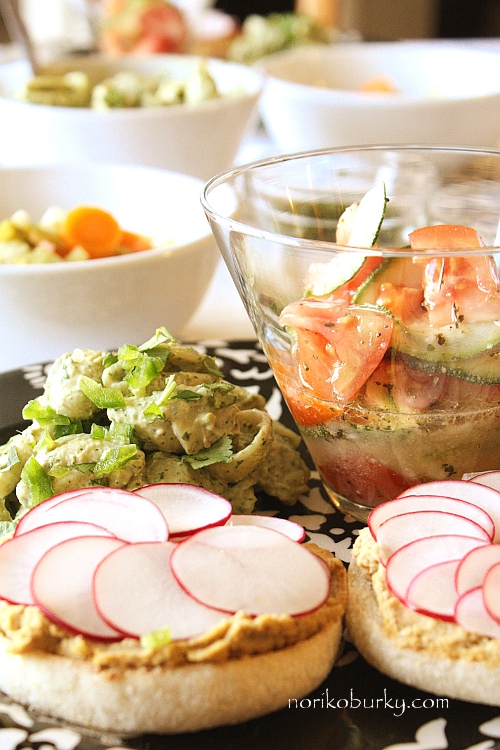
Spread it on lightly toasted English muffins and fan slices of radish.  The modest texture of the bread, creamy hummus and crunchy radish, all together worked for a nice light meal.


I like cost-conscious recipes in which you can make in big portion and arrange the leftovers.  I have finally gotten used to it but making a meal for a small family like mine often requires careful measuring for each dish to make the perfect amount.  I’m quite comfortable to say not many people like doing that.  Turning leftover dishes into something different is a good skill to develop for your own good.  Imagine you have…say, potatoes, zucchini, yellow squash, tomatoes, peppers, onions from a store one day.  Which is easier and time/money saving to make: a 2-3 yield of vegetable soup in one day then make ratatouille the next day using the veggies left in the fridge, or make 5-6 yield of vegetable soup then thicken it and use it for a rich base for ratatouille?  You can get the satisfaction of the fact you’ve made the base by your self from scratch instead of store-bought instant stuff.


Posted in Appetizer | 1 Comment